Friday, July 2, 2010

Crispy Fried Chicken


Okay I admit it, I have never fried a chicken in my life, except for wings, I'm an expert at that, if I do say so myself.  The other day my hubby and I were watching Cooks Country, love that show, and they made fried chicken.  My hubby turned to me and said, "mmmm, that looks good, you could do that next week right?"  Ummm, yeah, sure I can do it.  But there was a problem, I've never done it before, lucky for me Cooks Country takes all the guess work out of it, so I felt pretty confident.

In two months my family and I are moving to Tampa, so I am being very economical these days in my choices for meals.  By economical I mean cheap and chicken legs are cheap, especially at $0.89 per pound.  Not only are they cheap, they are tasty, and my kids love 'em.  So onto the menu the fried chicken went.

Cooks Country uses the same method for getting their chicken crispy as The Pioneer Woman does, using a little buttermilk in the flour to get the craggy crispy coating.  It really works well.  This chicken came out juicy and crispy.  I was surprised at how easy it was to fry chicken.

The recipe worked perfectly and I doubt I will search out another.  I will however add my own spices, but this method is the one I will use from now on.  I did tweak it a bit by adding a few more ingredients to the marinade, and next time I will let the chicken sit longer in the marinade as I felt it didn't pick up enough flavor.  I do an oven fried chicken recipe that sits overnight and that chicken comes out very flavorful.  All in all, a solid recipe that my family loved.  One side note, if you are doing a lot of chicken like I did (4 pounds of legs) use separate pans.  I fried one batch and then used that same oil to fry another, and the chicken came out darker than the first batch.  I don't recommend this. :}

On to the recipe:

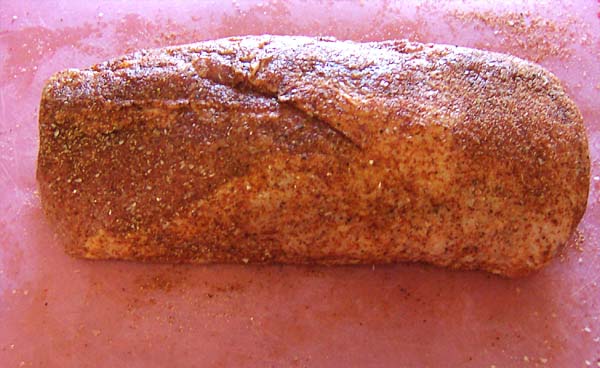
Start by marinading your chicken a buttermilk salt bath.  I added garlic, hot sauce, and Dijon mustard to mine.


Next add a little buttermilk to the flour mixture, it will look like small pea sized crumbs.  I tried to get a close up, but they didn't come out to well.


Flour the chicken and place on a wire rack set of a sheet pan until you are ready fry.


Put about 4 -5 cups of your fat of choice into a dutch oven, they recommended shortening or peanut oil.  I used peanut oil since we don't have any allergies to it in our family.  They said avoid canola because it gave "off flavors" to the chicken.  Use whatcha like.


 Now imagine you see a great shot of the chicken frying in the pan, mine was accidentally deleted.  After the 8-10 minutes on one side, flip the chicken and fry 6-8 minutes longer.  I used some pretty monster sized chicken legs and they took 10 minutes on the first side and 8 on the other.  They were perfectly cooked.

Transfer to a paper towel to cool at least 5 minutes, serve and enjoy that crispy chicken deliciousness.  Mmmmm, lip smackin' finger lickin' good chicken.


                       Extra-Crunchy Fried Chicken
Marinade
2        cups  buttermilk -- divided
2        tablespoons  table salt or 4 tablespoons kosher salt
My additions:
2        tablespoons Dijon mustard
2       cloves garlic, smashed
2       teaspoon hot sauce, I use Crystal

1       roasting chickens -- (3 1/2 lb) cut in 8 pieces (I used 4lbs legs)
3       cups  all-purpose flour
3/4    teaspoon  dried thyme
1/2    teaspoon  ground black pepper
1/4    teaspoon  garlic powder (I added 1/2 teaspoon)
2       teaspoons  baking powder
1       teaspoon paprika (my addition)

Remove 6 tbsp buttermilk and set aside. To remaining buttermilk, add salt and whisk until dissolved.   Add mustard, hot sauce, and garlic, stir to combine.  Cut chicken in 8 pieces (2 legs, 2 thighs, cut each breast in half). Place chicken in a gallon size freezer bag and submerge the chicken in buttermilk brine. Cover and refrigerate for 1 hour.

In a bowl, whisk together flour, thyme, pepper, garlic powder, paprika if using, and baking powder. Add reserved buttermilk and toss with fingertips to form pea-sized crumbs.

Drain chicken and transfer to breading, 2 pieces at a time. If you used the garlic in your marinade remove make sure it isn't on the chicken when you flour it.  Pack breading onto chicken firmly.  The more breading the crunchier the chicken.

Heat 4-5 cups vegetable shortening or peanut oil to 375°F It should be about 3/4" deep in the pot. Place chicken into hot fat, skin side down. The temperature will drop to about 300°F; maintain the temperature at 310-315°F Cover pot and cook 8-10 minutes; check chicken after 4 minutes to ensure even browning, and move pieces around if needed. After 8-10 minutes, turn pieces over; cook another 6-8 minutes until the second side is also golden brown.

Remove chicken and drain on paper towels. Allow to drain and cool 5-10 minutes before serving.

From "Cook's Country by America's Test Kitchen," episode 106, "All-American Picnic."


Tizzy Sig

Saturday, June 12, 2010

Crockpot Pulled Pork Braised In Cola. Yum.


Yes, it is another pulled pork recipe in a short amount of time, and yes it is another pork recipe right after another. I can't help it, I love pork, I love BBQ, I love easy, ........oh and I love a bah-gain. This pork was a bargain. I bought a 7 pound roast for a little over 12 bucks the other day.  I'll get 3 meals out of it, so yes that is a great bargain!

I cut the roast up into 3 roasts for my family.  I already showed you what I did with the first roast, roasted pork loin with rosemary and balsamic vinegar, well this is the second, and third since I did a double batch.  Which was supposed to be frozen for later use,  but of course it is almost gone, my GP's devoured it.  I can't complain, the GP's really love this pork.  Nothing makes me happier than my family enjoying a meal I've made for them.

Since I was using a pork loin, a long and slow cook in the oven is out, it's just to lean. I usually do my pork loin in the crockpot with kraut, and it comes out perfect and almost pulled, so I figured what the heck, just pop it in the crock. So that's what I did.

My roast is a little over 2 lbs, I want to say 2 1/4 lbs. I know from experience with the pork and kraut not to let it go too long, so I only cooked mine on low for 5 hours. Here's how I started it.


First I seasoned the roast up with my favorite BBQ rub. Notice I really put a nice coating on.


Then I sliced up a large onion, feel free to use what you like, I'm using a Vidallia.


Place the all but a few of the slices of onion in the bottom of the crock and lay the pork on top.  Separate the onion into rings and lay those on top of the pork roast.  You can dice the onion if you like so you can blend it into your sauce later, but a couple of my GP's hate onions, and it drives me bananas when I see them picking through their food to get them out.  Instead I sliced them a bit thicker and left them whole so they could be taken out later and added to mine and my husbands sandwiches later.  They even still had a texture to them and weren't complete mush, which I like.

After the onions pour 1 cup of Coke, Cherry Coke, or Rootbeer over the roast, and 2 tablespoons of cider vinegar.  Cover, turn on low, and let the aroma of yummy porkie-ness fill your home.  Cook for 5 hours, or check to see that a fork slides in and out of the pork easily, if it does you are good to go!


Remove the pork to a plate, bowl, what ever you like, to pull it.  This is what is should look like after the 5 hours.  Shreds up beautifully.  Pour the juices from the crockpot into a large measuring cup, it filled my 2 cup.  Place the shredded pork back in the crockpot.  Mix up 1 cup of your favorite BBQ sauce with 1/2 cup of the juices from the pork.  Add some vinegar to cut the sweetness.  Pour the sauce over the pork and mix it gently.  If your pork isn't wet enough for your liking, add more juices, if it isn't BBQ-ey enough for your liking, yes that is a made up word, add more sauce.  I find the ratio of 1 cup BBQ sauce to 1/2 cup juice was just right for us.  And judging by the two sandwiches my tween daughter ate, who normally eats like a bird, I'd say this was a hit.  Not to mention they also ate what was supposed to be frozen for a future meal.  But hey, I'm not complaining.  Having a meal that they go crazy for makes me happy.  And when Momma's happy, everyones happy.


Okay so don't hate me for this, but I don't have a picture of the plated pork sandwich.  I know, I know, I am so terrible at this.  But close your eyes and imagine this beautiful pork on a toasted bun, with a steamed ear of sweet corn, and a side of creamy slaw.  It would look a lot like this:


So please forgive me just this twice, third, or fifth time for being totally unprepared and bad at this blogging stuff.  I promise you, the pork is worth it!  It may not win you an award at the next BBQ championship, but sure as heck will satisfy your hungry family.

Now, make this:

Crockpot Pulled Pork Braised in  Cola

Rub:
1 teaspoon garlic powder
1 teaspoon onion powder
1 teaspoon sugar
1 teaspoon paprika
1 teaspoon chili powder
1 teaspoon fresh ground black pepper
1 teaspoon Kosher salt
The Roast:
2 lbs - 3 lbs boneless pork loin
1 large onion, peeled
1 cup Coke A Cola (or any cola, cherry cola, rootbeer you like)
2 tablespoons cider vinegar
The Sauce:
1 Cup BBQ sauce (homemade or your favorite brand, I used KC Masterpiece)
1/2 Cup drippings from roast
2 tablespoons cider vinegar


In a small bowl, combine ingredients for the rub. Liberally season the pork roast all over with the rub. You may have extra left over, I save it for later use in an empty spice jar.
Slice onion in half crosswise, then those slices in half again so that you have 4 large pieces, or dice it if you prefer. Separate the onion into rings. Lay almost all of the onion in the bottom of the crockpot, leaving a few rings for the top. Place roast on top of the onions and lay the rest of the onion on top of the roast. Pour cola and 2 tablespoons of cider vinegar over roast. Cover, turn on low, and cook for 5 hours. After 5 hours check to see if a fork slides into and out of the pork easily. If it does you are ready to shred, if not check it again in 30 minutes.
When the roast is ready, remove it from the crockpot. Pour out the juices into a large measuring cup or bowl. Set aside. Remove onion from crockpot. Either use them to top sandwiches, or slice them up and add them later to the shredded pork.
Using two forks, shred pork and return it to the crockpot. Mix 1 cup of BBQ sauce with 1/2 cup of juices, and 2 tablespoons of cider vinegar. Pour over the shredded pork and toss gently to coat the pork. If it isn’t wet enough, add a little more juice, if you like it thicker, add more BBQ sauce. Serve and enjoy!
A 2lb pork roast will feed a family of four nicely, 3lbs should feed a family of 6.

Click Me For The Printable Recipe

Now go.......

Tizzy Sig

Thursday, June 10, 2010

Roasted Pork Loin With Rosemary-Balsamic Glaze. Memories of my father.


I grew up in Pennsylvania. Shortly after graduating high school I decided to pack up and move to Florida. I lived in Florida for 7 years before meeting my husband. I remember our first trip to Pennsylvania when we brought our new daughter home to meet her Oma and Opa. We stayed with my father on his farm. I remember the first dinner he made us, it was a pork loin glazed with a rosemary, garlic, balsamic vinegar glaze, and it was delicious. I remember walking into a house full of smoke, asking what he was making and why he was burning it. He corrected me and told me he was not burning it, he was searing it.

I also remember all of this because it was the first time my father and I talked about cooking and recipes. I was still pretty young and my idea of cooking was using Reynolds plastic oven bags for my roasts or jazzing up Prego. Not that there is anything wrong with that. But I was eager to move up, so I was happy to watch him and learn from him. It started my love of cooking. I remember asking him how to make it and being anxious to get home and give it a try. This was the first roast other than an eye roast out of a Reynolds bag I made and it turned out just as delicious as his. It gave me confidence in the kitchen that with a solid recipe and a little instruction, I could make great things. :}

From then on I began watching PBS cooking shows and Food Network religiously. I think I had a subscription to every food magazine I could get my hands on. I was learning as much as I could so one day I could impress him. Now he and I talk about food all the time, share recipes, and he even gives me the occasional call for advice on a recipe. It is true, food does bring families together.

The recipe comes from Caprial Pence.  I believe she had a cooking show on PBS and that is where he saw the recipe.  This is my favorite recipe for pork loin. Not tenderloin, just the loin. This cut of meat may not be as tender, but when prepared in this way, it comes out moist and juicy. Sliced thinly, it was perfect the next day for sandwiches my father made for lunch.

Now that all that reminiscing is out of the way, on with the recipe.  I didn't capture a picture of making the glaze, or the veggies on the plate, what can I say, I'm new to this.  I keep forgetting things.  I'm trying to get better, I really am.

First you season up the roast with salt and pepper, make sure you really season it up as it's a thick piece of meat.  After you season the roast, I set it aside and make the glaze.  When the glaze is finished put a nice sear on your roast.

This is after 3 minutes per side, I thought the color was dark enough and my kitchen was smoked up enough so I stopped after the 3 minutes per side.  You will smoke up your house with this recipe, unless you have a super duper exhaust fan, which I do not.


After the sear, glaze that meat baby.  Really give it a nice coating.  You'll roast the pork for 15 minutes and then glaze it again.  Depending on the size of your roast, your oven, ect, ect, ......15-20 minutes later, zee roast, she is done.


Perfect every time.  I like my pork with just a tiny bit of pink in the middle.  Now just imagine there was some beautiful garlicky green beans on this plate, and ignore my lack of plating skills.  Thank you Caprial Pence for such delicious recipe, and thank you Dad for sharing it with me.


Roasted Pork Loin With Rosemary-Balsamic Glaze

2   cloves  garlic -- chopped
2   teaspoons  chopped fresh rosemary (I've also used thyme)
1/4 cup  brown sugar
3/4 cup  balsamic vinegar
3   pound  boneless pork loin (mine was a bit under 3lbs, more like 2.75 lbs)
Kosher Salt
Freshly ground black pepper
1   tablespoon  extra virgin olive oil (canola oil works here too)


Preheat your oven to 400 degrees.

Make the glaze:
Combine the garlic, rosemary, brown sugar, and balsamic vinegar in a saucepan over high heat.  Bring just to a boil, then turn heat to low and cook 5 minutes, until the brown sugar has dissolved. Set glaze aside.

Season the pork loin well with salt and pepper.

Heat the olive oil in a very large ovenproof saute pan over high heat until smoking hot. Add the pork and sear well, about 5 minutes per side.

Brush the pork liberally with the glaze, and set the pan in the oven. You can also transfer the pork to a baking dish if you don't have an oven proof pan.

Roast the pork loin for 15 minutes, brush with more glaze, and continue roasting 15 to 20 minutes longer for medium doneness.  I pulled mine out of the oven at 20 minutes and a temp of 145 degrees F.  Tented it for 10 minutes and it was perfect.  Make sure to let sit about 10 minutes before slicing. Slice very thin.

Adapted Recipe By :Caprial Pence

Click Me For The Printable Recipe

Now.......

Tizzy Sig

Tuesday, June 8, 2010

One meatball, two sauces.


I love meatballs. Fresh, homemade meatballs. Not the frozen processed plastic golf balls you get at sub shops and cheaper Italian restaurants. I also love that they are easy to throw together, all the GP's love them, and they are dirt cheap to make.

Recently my husband found out he will be working in Tampa for the next couple of years, which means we will pack up and move again this summer. This way he can be closer to work, and we can have better schools for our children. Win, win. A move, plus summer time means our budget will be tight for the next few months, so I just love when I can find cheap eats that still taste delish.


That is where meatballs come in. Ground beef is always cheap and can be used in so many ways. My favorite is a good juicy hamburger fresh from the grill. But, I don't have one at the moment, and no way in heck am I using the community grill at our complex. It's rusted, sitting uncovered under a tree where birds nest, and I've seen my fair share of their presents left behind on it. It baffles my mind that people actually use that grill.

So burgers are out, but one of these days I will break down and purchase a cast iron grill pan so I can do them on the stove top. Especially since when we move I will finally have a gas stove. Which I am super excited about!!! Until then, I'll make meatballs.

I have yet another recipe I wanted to try from The Pioneer Woman for her BBQ Meatballs, but when my husband heard meatballs that I wasn't putting in marinara, he asked me to make his favorite Honey Garlic Meatballs.

I usually make them New Years Eve. My family likes to do a buffet of appetizers that we nosh on all night. The meatballs are always gone first. The recipe I used for the meatballs was a Cooking Light recipe for Beef Meatballs but I was out of eggs and Ree's doesn't use eggs so I went with hers.

I have to say I had mixed feelings about the final result. I only cooked mine for 30 minutes and they could have gone 5 minutes less. I did however love the method of rolling them in flour and briefly browning on top of the stove and that tangy BBQ sauce that covered them. Usually I just bake them meatballs in a hot oven and glaze them in the honey garlic sauce, but this time I did like Ree and poured it over top and baked. They were so tasty. But again, they were a bit over cooked and needed a bit of garlic to give them some umph for me.

All in all, the recipe is easy, cheap, and quick to come together. I think adding a bit of garlic and cutting back on the baking to 25 minutes would give me a much tastier ball - o -meat. Either way, you can't go wrong, my GP's gobbled up the honey garlic before the BBQ. Can't say I blame them, they were my favorite too!

I served them over jasmine rice because that is what I had on hand. Ree suggests egg noodles, mashed potatoes, or crusty French bread. The honey garlic meatballs are great little party appetizers too. Like I mentioned before, I didn't have egg so I used Ree's meatball recipe for the browning and baking but I'm giving the original recipe for how I make them.
Let's get cooking......


After you mix up the meatballs you pop them in the freezer for 5 minutes, then roll them in flour.


Then fry baby fry, or is it saute baby saute? Or brown baby brown?


Then pop them into a baking dish.


Then give em' some sauce and pop them in the oven.


Check them at 25 minutes.....mmmmm, look at those babies. Resist the urge to pop one in your mouth, those suckers are HOT!!!


And serve anyway you like, over rice, mashed taters, as a sandwich, or just by themselves. Just make them.

I'm giving both original recipes, but feel free to mix it up and use Ree's recipe for meatballs with the honey garlic sauce, you won't be disappointed.

BBQ Meatballs


FOR MEATBALLS
1 1/2 pound Ground Beef (I used 2 pds)
3/4 cups Oats (I used 1 cup of quick oats)
1 cup Milk (I used a bit more I think 1 1/4)
3 Tablespoons Very Finely Minced Onion (I used 4)
1 1/2 teaspoon Salt (I used 2)
Plenty Of Ground Black Pepper, to taste
FOR COOKING MEATBALLS
1 cup All-Purpose Flour (coating For Frozen Meatballs)
Canola Oil
FOR SAUCE (I  cut this in half since I was making half a batch of honey garlic)
1 cup Ketchup
2 Tablespoons Sugar
3 Tablespoons Vinegar
2 Tablespoons Worcestershire
4 Tablespoons (to 6 Tablespoons) Onion
1 dash Tabasco

Preheat oven to 350 degrees.
Combine all meatball ingredients. Roll into medium-small balls and place on a cookie sheet. Place sheet in freezer for five minutes.
After 5 minutes, remove meatballs from freezer and immediately dredge in unseasoned flour.
Brown meatballs in canola oil until just brown. Place into a baking dish.
Combine all sauce ingredients. Pour over meatballs and bake at 350 degrees for 45 minutes. (I cooked mine for 30 and probably would only go 25 next time, maybe my oven is hotter?)


Honey Garlic Meatballs 

1 1/2 pounds ground round
1/4 cup (1 ounce) finely shredded fresh Parmesan cheese
1/2 cup dry breadcrumbs
1/3 cup chopped fresh parsley
1/4 cup tomato sauce
1 teaspoon dry mustard
3/4 teaspoon dried Italian seasoning
1 teaspoon salt
1/4 teaspoon Freshly ground black pepper, or to taste
2 garlic cloves, finely minced, pressed, or grated on a microplane zester
Cooking spray
Sauce:
2 Tbsp. butter
3 cloves garlic, minced
3/4 cup ketchup
1/2 cup honey
1/4 cup soy sauce (I use Lite)

Preheat oven to 400°.

Combine the ground round, parm cheese, breadcrumbs, parsley, tomato sauce, mustard, Italian seasoning, salt, pepper and 2 cloves of minced garlic in a bowl and mix well.

Prepare a broiler pan by coating with cooking spray. Shape mixture into 30 (1 1/2-inch) meatballs. Bake at 400° for 15 minutes or until done. Drain the grease and set them aside.

While meatballs cook make your sauce.

Melt butter in saucepan and saute garlic until it is fragrant, about 30 seconds. Add ketchup, honey and soy sauce. Bring to a boil, reduce heat, cover and simmer five minutes. Add meatballs to sauce. Return to a boil and simmer uncovered 5 until sauce glazes meatballs.


Now.....


Tizzy Sig

Monday, May 24, 2010

Oven BBQ'd Chicken Drumsticks with Cola Q' Sauce


Are you a leg person? I am. Actually, I like all the parts of the chicken, but my kids love the legs. I love that they are dirt cheap this week at the grocery store, $.89 a pound, how can you not love that?

I was in the mood for a little BBQ, when am I not? Almost never. I just wish I had my charcoal grill. Nothing beats chicken with a sticky sweet BBQ glaze right off the grill. Cold from the frig is good too. Ahhh, I can hear my daughter now while she's reading "ewwww mom, that's gross." She doesn't know what's she's missing. Cold BBQ chicken is awesome. So is fried. But that will be for another day.

I am a Coke A Cola fiend. I admit it. Next to sweet tea with lemon, it's my favorite beverage of choice. So I decided to throw together a cola sauce. We like sweet sauces with a little tang so this one is pretty sweet. Feel free to adjust the sugar. And don't limit yourself to just Coke, you could also use root beer, Dr. Pepper, Cherry Coke, ect, ect.
But I wouldn't recommend diet sodas, since I don't drink them and I've never used them, can't say how they would turn out. Sorry.

So here we go. I started the chicken with a quick brine. My brine solution comes from America's Test Kitchen, I use it for pork too. Works great. Never to salty and the meat is always moist. I find it seasons the chicken perfectly. Just make sure to rinse it off. Of course I forgot to take a picture of this step. I'm new to this. Bear with me. It'll get better. Promise. :)

After you brine them you'll want to rinse them, pat them dry, and season them up ~ go ahead give then a little rub.


Once you have them seasoned I like to baste them with a little butter, cause it makes everything better. Feel free to use olive oil, canola oil, or even Pam.


Then preheat your oven to 400 degrees, spray a roasting rack with Pam ( here is the one I am using, cheap as chips: Professional Cross Wire Cooling Rack Half Sheet Pan Size) set over a pan lined with foil and pop them in the oven on the center rack. Roast them for 45 minutes. While they are roasting make your BBQ sauce. After they are finished roasting remove them from the oven and turn it to broil. Brush the legs lightly with BBQ sauce and put them under the broiler for 2 minutes, or until they start brown and get bubbly. Remove them from the oven and give them a little more sauce. Pop them back under the broiler until they are spotty black in spots. Not all black, that's burnt. After they are colored to your liking take them out and let them rest 10 minutes before serving.


Mmmm, look at that sticky yumminess.....


Oven BBQ'd Chicken Drumsticks with Cola Q' Sauce

3 lbs chicken drumsticks
1/2 stick unsalted butter -- melted
Brine
1/4 cup table salt
1 quart water
Spice Rub
1 teaspoon paprika
1 teaspoon chili powder
1 teaspoon garlic powder
1 teaspoon onion powder
1 teaspoon brown sugar
1/2 teaspoon freshly ground black pepper
1 teaspoon kosher salt (omit of brining)
Cola Barbecue Sauce:
1/4 cup onion -- grated on the large size of a box grater, with juice
2 cloves garlic -- pressed, grated on a microplane, or minced fine
1 cup cola (recommended: Coca-Cola)
1 cup ketchup
1/4 cup Worcestershire sauce
1/2 teaspoon liquid smoke -- 1 tsp if you prefer a smokier sauce
1 tablespoon cider vinegar
1/4 cup brown sugar
1/2 teaspoon freshly ground black pepper
1 tablespoon Dijon mustard


To make the brine:
Dissolve salt in cold water. Place chicken in gallon size ziplock freezer bag placed inside of a large bowl, or place chicken inside of a large bowl and pour brine over chicken. If using a baggie, squeeze out any extra air, zip bag closed. If not using a bag, cover the chicken with plastic wrap, I weigh it down so all the chicken is submerged. Place chicken in the frig for at least 30 minutes, I usually do for an hour. I wouldn’t go longer than 4 hours, but that’s me. Do whatcha like.
After the quick bath in brine, I rinse the chicken thoroughly and pat it dry.
Rub and Roast:
Preheat your oven to 400 degrees. Spray a roasting rack with Pam and lay it over a foil lined baking sheet, or you can line a baking sheet with aluminum foil sprayed with Pam.
Combine the rub ingredients, paprika, chili powder, garlic powder, onion powder, brown sugar, pepper, and salt **only if not brining. Sprinkle the chicken liberally with the rub. Take some melted butter and lightly baste the chicken with it. Pop it into the oven for about 45 minutes. While chicken cooks, make the sauce.
For the sauce:
In a heavy non-reactive saucepan over medium heat combine onion, garlic, cola, ketchup, worcestershire sauce, liquid smoke, cider vinegar, 1/4 cup brown sugar,
1/2 teaspoon black pepper, and dijon mustard. Give it a stir and gradually bring to a boil.
Reduce the heat slightly to keep a gentle simmer going. Simmer the sauce until reduced and thickened, about 30 minutes.
Back to the chicken……
After the 45 minutes is up, remove the chicken from the oven and preheat your broiler.
Baste chicken lightly with the sauce, pop it under the broiler for a few minutes, until it starts to bubble and brown. Every broiler is different, it usually takes about 2 minutes in mine. Remove chicken from broiler and baste again with sauce, this time lay it on a bit thicker. Pop it back under the broiler for a few minutes, until it begins to char in some spots, usually another 2-3 minutes. Broil until it’s the color you like. I like mine spotty black and charred in a few spots.
Try subbing Dr. Pepper, Cherry Coke, or even rootbeer for Coke. I have never tried diet sodas so can’t recommend it.


Enjoy.


Now.....
  Tizzy Sig

Wednesday, May 12, 2010

Homemade Soft Pretzels. Yum.


Last night I was out of dessert for the little GP's, and just like old Mother Hubbard, I went to my cupboard, and it was bare.  Okay, maybe not bare, but it had very little sugar and very little cocoa powder.  I was also low on butter, so I searched through the mountain of recipes I have in my Mastercook and came up with pretzels.  Hardly any sugar and butter, no cocoa and I still had yeast left from when I made Moomie's Buns.  Saving me a trip to the store, bonus!  Picking up one item from the store drives me bonkers.  I don't know why, maybe because I spend so much time at the grocery store, maybe because I hate jumping in the truck during hottest part of the day to get there.   Either way, I hate it, so I don't do it.

Onto the recipe. Can I just say making pretzels is pretty simple?  I cannot tell you how much better homemade is than the store bought ones, and so easy to make too!  No need to buy them again. But here is a tip, active dry yeast and rapid/instant yeast are not used the same.  I followed Alton's instructions for combining the sugar, salt, and water in a bowl then adding yeast. When I returned to my mixing bowl, after the 5 minute foaming stage, there was no foam.  I am not a baker, as I said before, but I have baked a few yeasty treats before and have picked up a thing or two.  When using rapid rise yeast it works a bit different than active dry.   If using rapid rise, add it to the flour, not the water, and heat your water to 120-130 not 110-115, unless you want dead yeast like me.  Poor little yeasties.

After I fixed my yeast faux pas, I continued on with the recipe exactly the way Alton instructs.  Very straight forward recipe. All of his are, which is why I love them so much.  Now, mine looked like a 5 year old rolled them out, except for one or two that were pretty enough and actually resembled a pretzel.  These are the ones I am showing you of course.  Looks aside, they were sooooo yummy!  Isn't that what matter's the most?

I have read a few comments about these being like a Philly pretzel, on that I will disagree.  When I think of Philly pretzels, I think of the ones that they sell downtown on the streets.  Those are very dense and chewy, and sticky too.  These were not.  They had some chew, but were not dense at all.  I found 14 minutes in my oven produced a nice dark brown pretzel that was crusty on the bottom, soft and chewy in the middle, and devoured in less than a minute. I used a little melted butter mixed in with the oil to brush on the foil instead of all oil like Alton instructs. Using a little butter gave mine a nice crusty buttery bottom, I love buttery bottoms. I like buttery anything. It makes everything better. Oh, and here is a tip, Alton tells you to use parchment for a reason. That reason, so you don't have to peel your pretzels off of the foil and burn the crap out of your fingers like I did.  So don't be like me, use parchment.  Maybe I should have gone to the store after all?

I already have visions of pretzel variations dancing in my head.  Cinnamon and sugar, onion for my hubby, maybe a bit of melted chocolate. You could do so much with this basic recipe and I plan to.  The hardest part of making pretzels was waiting for them to cool 5 minutes before eating.  My family loved them, yours will too.  And if they don't, send them to me, with some spicy brown mustard, cause that's how I roll.


Risen dough, don't you just want to poke it?


Misshapen pretzels out of their bath and ready for the oven. Remember, don't be like me, use parchment.


Pass the mustard?


Alton Brown’s Homemade Soft Pretzels

1 1/2 cups warm (110 to 115 degrees F) water
1 tablespoon sugar
2 teaspoons kosher salt
1 package active dry yeast
22 ounces all-purpose flour, approximately 4 1/2 cups
2 ounces unsalted butter, melted
Vegetable oil, for pan
10 cups water
2/3 cup baking soda
1 large egg yolk beaten with 1 tablespoon water
Pretzel salt

Combine the water, sugar and kosher salt in the bowl of a stand mixer and sprinkle the yeast on top. Allow to sit for 5 minutes or until the mixture begins to foam. Add the flour and butter and, using the dough hook attachment, mix on low speed until well combined. Change to medium speed and knead until the dough is smooth and pulls away from the side of the bowl, approximately 4 to 5 minutes. Remove the dough from the bowl, clean the bowl and then oil it well with vegetable oil. Return the dough to the bowl, cover with plastic wrap and sit in a warm place for approximately 50 to 55 minutes or until the dough has doubled in size.

Preheat the oven to 450 degrees F. Line 2 half-sheet pans with parchment paper and lightly brush with the vegetable oil. Set aside.

Bring the 10 cups of water and the baking soda to a rolling boil in an 8-quart saucepan or roasting pan.
In the meantime, turn the dough out onto a slightly oiled work surface and divide into 8 equal pieces. Roll out each piece of dough into a 24-inch rope. Make a U-shape with the rope, holding the ends of the rope, cross them over each other and press onto the bottom of the U in order to form the shape of a pretzel. Place onto the parchment-lined half sheet pan.

Place the pretzels into the boiling water, 1 by 1, for 30 seconds. Remove them from the water using a large flat spatula. Return to the half sheet pan, brush the top of each pretzel with the beaten egg yolk and water mixture and sprinkle with the pretzel salt. Bake until dark golden brown in color, approximately 12 to 14 minutes. Transfer to a cooling rack for at least 5 minutes before serving.


Tizzy Sig

Sunday, May 9, 2010

Happy Mother's Day to all you Mothers, Mommies, Mums, and "Mutha's"....


It's Mother's Day and for me that means I am barred from the kitchen.  That's right, DH and the little GP's don't allow me to cook or clean up on Mother's Day.  The cleaning up, I can deal with, but the cooking is killing me today.  I've been reading so many blogs this weekend, and finding so many new recipes I want to try that I am antsy to get back in the kitchen.

Warning, this post is very long.....I can't help it, I love roasted chicken.......

Now if I were cooking today, something for myself, it would be a roasted chicken.  Next to a nice juicy steak, nothing beats a perfectly roasted chicken with homemade gravy and mashed garlic potatoes.  At least in my book.  And since I am still working on my steak technique, I would cook myself a roasted chicken.  Extra crispy skin, please.  And pass the gravy.

But since I can't, I will just have to blog about the one I made yesterday.  Guess, I had my roasted chicken after all. ;)

I wanted a simple roast chicken, nothing to herb-ey.  Since I will be using the left over chicken carcass (carcass, every time I hear that word I think of buzzards picking at some roadkill, isn't there a better word?) to make chicken stock because my freezer is out at the moment.     I was also out of a lot of fresh herbs, carrots, and celery, oh and to lazy to go to the store.  Usually my favorite recipe for simple roast chicken is Thomas Keller's method, dry the chicken inside and out, let the kosher salt rain down on the skin, sprinkle with fresh black pepper, truss, and roast at 450 degrees for about an hour.  But with this method comes a lot of smoke, maybe it's the pan I use or fatty chickens, I don't know.  I do know  I wasn't in the mood for being smoked out, and since it's 90 degrees here I couldn't open my windows,  I went a different route.

Cooks Illustrated starts their chicken off  with a brine, slathers on an herb rub, roasts on one side, flips and finishes on the other.  I like this method.  Since I didn't have homemade broth, I decided to skip the brine today.  Last time I brined and used low sodium broth the end result was still a little too salty for the gravy.  Don't know if I just didn't rinse the chicken well enough or not.  I didn't want a salty gravy, or one I would have to dilute.  Gravy makes my world go round, didn't want to mess it up, so I skipped the brining.  Feel free to brine, or not brine, there is no question, a chicken roasted properly doesn't have to be brined.


Did I happen to mention I hate to clean a rack after roasting a turkey or chicken? I do, I hate it more than anything, so here is my solution.  Foil.  I love  foil.  I just take a small piece and wrap it around each rack grate (are they grates?) and the bottom that touches the pan.  Saves me a ton of time (and cursing) during clean up.  I also love foil when I run out of twine for trussing my chicken.  Easy peasey made just for me-sey.


So here it is, a simple roast chicken for when the fridge is bare and you are too lazy to drive to the store:


Simple Roasted Chicken with Garlic Butter


1 whole chicken (about 4 pounds)
1 stick of unsalted butter at room temperature (you won't need all of it, just make sure you have enough on hand)
Kosher salt
Freshly ground black pepper
1 small clove garlic
1 medium onion, peeled and cut in half
2 cups low-sodium chicken broth ( I prefer homemade or Swanson Organic)
1/2 cup water
1/4 cup dry white wine or vermouth (can omit and use all broth)
1 sprig of rosemary or thyme (optional)
Cornstarch


Adjust oven rack to lower-middle position and heat oven to 450 degrees. Set V-rack in small roasting pan and lightly spray rack with nonstick cooking spray, or cover the with foil like I did.

Remove the giblets from the inside of the chicken.  I toss them except for the neck.  Don't bother to rinse the chicken, rinsing your chicken is not necessary, in fact the FDA advises against it since you can contaminate your kitchen more so by doing it, so don't do it.  K?

Take 1/2 stick unsalted butter at room temperature in a small bowl, press, finely mince, grate, put through a food processor, whatever is your chosen method for finely mincing one small clove of garlic, do it, and add it  into the butter, then add about a 1/2 teaspoon of kosher salt, and some fresh ground pepper black pepper, maybe an 1/4 -1/8 of a tsp (all depends on how much you like pepper, I lerve it!)

Loosen the skin from the chicken, careful not to tear it. Grab up some of that butter and rub it under the skin, I go heavy on the breasts since that is the favorite for the GP's and part of the chicken most in need of flavor and moisture.  Lay it on thick, I do.  Butter makes everything better.  After the breast is done go down into the legs.  Rub the skin down with some of the unflavored butter, or olive oil, and season it up with a little kosher salt and pepper.

Season the inside of the chicken cavity with salt and pepper.  I don't have an exact measurement, just a pinch inside of kosher salt should do the trick and a few grinds of pepper.  Now if you are a trusser, truss, if you are not, don't.  I found myself out of twine so I ended up using foil, which was a heck of a lot easier!  Just tear of a small piece of foil, going lengthwise, roll it, scrunch it, do whatever it takes until it looks like a piece of long rope.  Cross the legs together and wrap the foil around the legs, twist it to tighten it so that it stays. I love foil.


I roast two at a time, using the same timing.  These are breast side up, you want to begin with them breast side down. Notice the little necks.  Great for the gravy.

Add the onion to the pan and place those necks right on top.  Set your chicken on the rack breast side down and place in the roasting pan. Roast chicken for 30 minutes.

Remove roasting pan from oven; decrease oven temperature to 375 degrees. Using tongs or wads of paper towels, (or silicon heat resistant oven mitts like I have) and rotate chicken breast-side up; brush breast with 1 teaspoon oil or melted butter. Add 1 cup broth and 1/2 cup water to pan and continue to roast until chicken is medium golden brown and instant-read thermometer inserted into thickest part of breast  is 160 degrees, or thigh registers about 175 degrees, (an additional hour in my oven, but you should really go by the temperature of the chicken.) Tip V-rack to allow juices in cavity to run into roasting pan. Transfer chicken to a plate to catch any additional juices.. Let it rest at least 15 minutes before trying to carve, I wait 20.  While you wait, make the gravy.

Remove chicken neck and onions, set aside for gravy.  Using a wooden spoon, scrape up browned bits in roasting pan and pour into a fat separator, or into a freezer baggie set inside of a 2-cup liquid measuring cup. Allow liquid to settle; once settled if you are using the baggie method,  seal the baggie, it should be in a cone shape from the 2 cup measuring cup, snip of the end over a small saucepan.  Keep the measuring cup close by, when you get down to the fat, plop the baggie in the measuring cup.  Don't throw this down the drain of your sink, it will congeal and clog it.

Once you transfer the juices to small saucepan, then add wine, onions from the pan, chicken neck, herb sprig, and remaining broth; simmer over medium heat, until you have the flavor you want, about 10-15 minutes. Add accumulated juices from chicken and discard herb sprig and chicken neck.  If you like a thicker gravy like I do, take a tablespoon or two of cornstarch and add enough water to make a thin paste, or a slurry.  Whisk in a little at a time to your boiling broth, you may not use all of it, you may need more, depends on your preference. When you are happy with the consistency, adjust the seasonings with salt and pepper to taste.

Carve chicken and serve with gravy and savor that deliciousness.   As you can see I make two at a time, I save the bones and wings for stock, and any leftover chicken is either used up the next day simmered in leftover gravy and poured over white bread, or if I'm out of gravy I use the leftovers for chicken salad.  De-lish!


Tizzy Sig


Thursday, May 6, 2010

Beans, beans, the magical fruit......the more you eat......the more you....


Come on sing along if you know the words.  My grandfather used to sing the bean song to us when we would eat beans, and now I sing it to my older daughter who just hates it.   The song and the beans.  Which is fine with me, because then there are more for me, and my littlest GP who loves them as much as I do.

Yesterday for Cinco de Mayo I made grilled chicken tacos.  No recipe just rubbed them down with a bit of spices, grilled them on my Foreman grill.  With those tacos I made oven roasted corn from the farmers market, yum.  I also made my favorite black beans, Frijoles De Lata.

I lived in Miami for a little over 4 years.  I loved the food in Miami, so many different cultures to choose from.  One of my favorites was the Cuban food.  I worked downtown where little Cuban cafes were plentiful.  Cafe con Leche, (cuban coffee with milk) and pastelitos with guava and cheese, were my usual breakfast.  Afternoon snacks of ham croquetas were frequent occurrences as well.  My favorite of all was dinnertime, mojo marinated grilled chicken breast, sweet caramelized plantains, with black beans and rice is a perfect meal.  Mmmmmmmm....I could eat that every day........how I miss authentic Cuban food.

Lucky for me I met a Cuban friend on a message board and she shared a recipe for black beans.  She called them "quick and easy black beans."  I'm all for quick and easy.   The first time I tried them it brought me back to the days when I lived in Miami.  They tasted exactly the way a little cafe around the corner from where I worked made them.  They are so flavorful and easy, I make them often.  Hope you enjoy them as much as I do!


Frijoles De Lata (quick and easy black beans)

1/2 cup pure Spanish olive oil
2 cloves garlic, finely chopped
1/2 small red onion, finely chopped
1 medium size green bell pepper, seeded and finely chopped
1 large , ripe tomato, chopped, or 1/2 cup chopped and drained canned whole tomatoes
Two 16-ounce cans black beans, with their liquid
1/2 cup Cuban beef stock, canned beef broth or water
1 teaspoon ground cumin
Few dashes of Tabasco sauce, optional
1 tablespoon red wine vinegar, optional
Salt and freshly ground black pepper to taste
Chopped onion, minced fresh parsley, or minced fresh coriander
for garnish (cilantro)


In a medium-size saucepan over low heat, heat the oil until it is fragrant, then cook the garlic, onion, and bell pepper, stirring, until tender, 10 minutes. Add the tomatoes and cook another 10 minutes. Add the beans, stock, cumin, Tabasco, and vinegar, stir to blend, correct the seasonings, and simmer, covered, until heated through, 20 minutes.

Garnish and serve with beans hot over Arroz Blanco (white rice)
Recipe courtesy of Gail CL board


Enjoy!

Tizzy Sig

Tuesday, May 4, 2010

Creamy Coleslaw

Yesterday I forgot to post the recipe for coleslaw, so I'm doing it now. :) This slaw is creamy, and a little sweet, just the way I like it..  If you want more zing add more vinegar.


  Coleslaw

  1   head  green cabbage -- shredded*
  1   small  carrot -- peeled and shredded*
  2/3 cup  mayonnaise
  1/4 cup  sugar
  2   tbsp.  milk
  2   tbsp.  vinegar
  1/2 tsp.  salt
  1/4 tsp.  pepper


Toss cabbage and carrot in a medium bowl. Combine remaining ingredients and pour over cabbage mixture; toss to coat. Cover and refrigerate several hours or overnight to allow flavors to blend. Yield: 6 to 8 servings.

*Useful Tip: For extra convenience, use one package (16 ounces) refrigerated cole slaw mix (cabbage and carrots)

recipe source: Steph's Country Kitchen Goodness


Tizzy Sig

Monday, May 3, 2010

I like big butts and I cannot lie ....you other Q'ers can't deny...


Pork butts that is.  I especially like them already de-boned.  De-boning a pork butt would not only save me time, but stop me from exposing my young GPS to the swearing that went on in the kitchen yesterday morning while doing it.  Okay I admit it, this was the first pork butt I have ever used for pulled pork.  My usual cut is a boneless shoulder, but yesterday I decided to try something new.  In trying something new I learned if the Boston butt does not read boneless, it is not boneless.  Seems pretty simple now that I think about it. Hey, rump roast doesn't read boneless, or eye round for that matter, both boneless.  Remember, I am not a chef.

Sunny Florida is heating up, and when it gets hot outside I have a craving for BBQ.  But we recently relocated to Florida, and we are living in an apartment, which means we no longer have our Weber charcoal grill.  So what's a chick to do when she wants BBQ and doesn't have a grill?  Cook it indoors of course.

I have a great recipe for indoor Memphis style pulled pork that I usually use and it is de~lish, but when Cooks Illustrated (January 2010) came out with a recipe I had to try it.  

In this recipe CI tries to get the smoky flavor you would normally have by using a grill, but you slow roast the pork in the oven.  Now, I know BBQ is a very personal thing to a lot of people.  BBQ pork in the oven is blasphemy to true BBQ worshippers.  "It isn't BBQ if it isn't cooked outside on a grill."  Yeah I know, but I don't have access to a grill and I WANT BBQ!   I don't care that it hasn't slow roasted over a bed of coals or wood, and that it is missing a perfect smoke ring inside.  I care that is satisfies my craving and that my GP's love it and think I am a kitchen goddess (which they do.)   They don't know it's not true BBQ nor do they care.  

I have to admit, I like the method of the recipe, brining, slow roasting, and drying out the meat a bit to get a nice "bark," but, the rub could have used some punch.  I have never ever, ever, ever, made a recipe for BBQ that didn't have garlic powder in the rub.  I love garlic, so I felt that was missing, and some onion powder why we're at it.  Next time I make this I will definitely use my own recipe for rub.  I thought it lacked punch.  The slathering of the meat with mustard and smoke flavor added nice flavor to the bark, this is my first time trying that and I will definitely do that again.  The brine perfectly seasoned the pork, but didn't impart a big smoke flavor.  Good news for me because my hubs isn't a fan of really smoky meats.  All in all the pork recipe its self is great for an indoor pulled pork.  For those who don't like smoke, it isn't very smoky at all.  Pork perfect, my problem was with the sauces.  

I have been dying for a good Carolina mustard based sauce.  I was hoping CI would deliver and well, they didn't.  For me anyway.  I know a few people around the web have tried this recipe and loved the sauces, sorry I am not in that crowd.  Don't know if it was the brand of mustard I used, or the fact that the mustard ratio to other ingredients was way higher than any other I have seen around the web, but the end result was not a keeper in this house.  In fact I dumped it because it went untouched at dinner.   We also felt the Sweet and Tangy Barbecue Sauce lacked punch so I ended up making my own sauce.  I'd give the recipe for that but I just threw together a bunch of ingredients until it tasted good.  All in all this is a great indoor pulled pork recipe,  but for my taste, next time I will change the rub and sauces. 


Pulled pork on homemade buns, with a side of creamy slaw, and oven roasted fresh corn on the cob from the farmers market, life is good.


Indoor Pulled Pork
Cook's Illustrated (January 2010)

Serves 6 to 8

Note: Sweet paprika may be substituted for smoked paprika. Covering the pork with parchment and then foil prevents the acidic mustard from eating holes in the foil. Serve the pork on hamburger rolls with pickle chips and thinly sliced onion. Alternatively, use 2 cups of your favorite barbecue sauce thinned with ½ cup of the defatted pork cooking liquid in step 5.  The shredded and sauced pork can be cooled, tightly covered, and refrigerated for up to 2 days. Reheat it gently before serving.

INGREDIENTS

      1  cup plus 2 teaspoons table salt
      ½  cup plus 2 tablespoons sugar
      3  tablespoons plus 2 teaspoons liquid smoke
      1  boneless pork butt (about 5 pounds), cut in half horizontally
      ¼  cup yellow mustard
      2  tablespoons ground black pepper
      2  tablespoons smoked paprika (see note)
      1  teaspoon cayenne pepper

DIRECTIONS

 1. Dissolve 1 cup salt, ½ cup sugar, and 3 tablespoons liquid smoke in 4 quarts cold water in large container. Submerge pork in brine, cover with plastic wrap, and refrigerate for 2 hours.

2. While pork brines, combine mustard and remaining 2 teaspoons liquid smoke in small bowl; set aside. Combine black pepper, paprika, remaining 2 tablespoons sugar, remaining 2 teaspoons salt, and cayenne in second small bowl; set aside. Adjust oven rack to lower-middle position and heat oven to 325 degrees.

3. Remove pork from brine and dry thoroughly with paper towels. Rub mustard mixture over entire surface of each piece of pork. Sprinkle entire surface of each piece with spice mixture. Place pork on wire rack set inside foil-lined rimmed baking sheet. Place piece of parchment paper over pork, then cover with sheet of aluminum foil, sealing edges to prevent moisture from escaping. Roast pork for 3 hours.

4. Remove pork from oven; remove and discard foil and parchment. Carefully pour off liquid in bottom of baking sheet into fat separator and reserve for sauce. Return pork to oven and cook, uncovered, until well browned, tender, and internal temperature registers 200 degrees on instant-read thermometer, about 1½ hours. Transfer pork to serving dish, tent loosely with foil, and let rest for 20 minutes.

5. FOR THE SAUCE: While pork rests, pour ½ cup of defatted cooking liquid from fat separator into medium bowl. Whisk in ingredients (see below).

6. TO SERVE: Using 2 forks, shred pork into bite-sized pieces. Toss with 1 cup sauce and season with salt and pepper. Serve, passing remaining sauce separately.


Sweet and Tangy Barbecue Sauce

INGREDIENTS

      1½   cups ketchup
      ¼  cup light or mild molasses
      2  tablespoons Worcestershire sauce
      1  tablespoon hot sauce
      ½  teaspoon table salt
      ½  teaspoon ground black pepper

DIRECTIONS

While pork rests, pour ½ cup of defatted cooking liquid from fat separator into medium bowl; whisk in sauce ingredients.


Lexington Vinegar Barbecue Sauce

INGREDIENTS

      1   cup cider vinegar
      ½  cup ketcup
      ½  cup water
      1  tablespoon sugar
      ¾  teaspoon table salt
      ¾  teaspoon red pepper flakes
      ½  teaspoon ground black pepper

DIRECTIONS

Combine all ingredients in a medium bowl with ½ cup defatted cooking liquid (in Step 5) and whisk to combine.


South Carolina Mustard Barbecue Sauce

INGREDIENTS

      1   cup yellow mustard
      ½  cup white vinegar
      ¼  cup packed light brown sugar
      ¼  cup Worcestershire sauce
      2   tablespoons hot sauce
      1  teaspoon table salt
      1  teaspoon ground black pepper

DIRECTIONS

Combine all ingredients in a medium bowl with ½ cup defatted cooking liquid (in Step 5) and whisk to combine.


Now....

Tizzy Sig